시놀로지 + Ollama + lfm2.5 + Chatbot-Ollama 설치 가이드
on-device 환경에서 가볍게 돌릴 수 있는 LLM인 lfm모델과 시놀로지 DS225+를 활용해 외부 클라우드 연결 없이 내 NAS 안에서만 동작하는 로컬 AI 챗봇 환경을 구축해 보겠습니다.
일반적인 Local LLM은 고성능의 GPU와 메모리가 필수적입니다.
(ex. llama, qwen, glm ... .etc)
lfm모델의 경우 on-device에서도 막강한(?) 퍼포먼스를 보여주는 소형모델로 스마트폰이나 모바일cpu에서도 빠르게 실행할 수 있는 모델입니다.
현재 집에서 사용하는 NAS인 시놀로지 DS225+의 사양입니다.
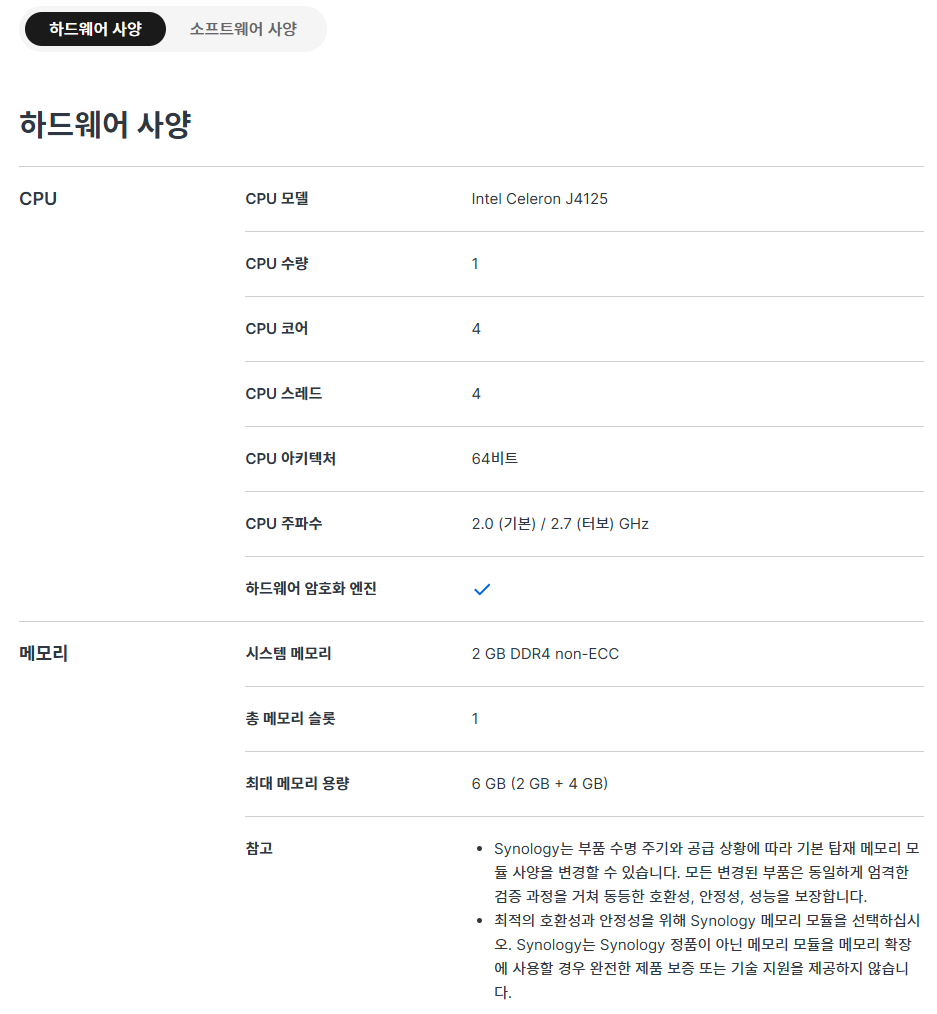
음.. 이 정도면 괜찮을려나(?) 싶지만, 진행해보겠습니다.
(참고로 RAM은 기본 2GB + 16GB로 18GB 업그레이드된 상태 입니다.)
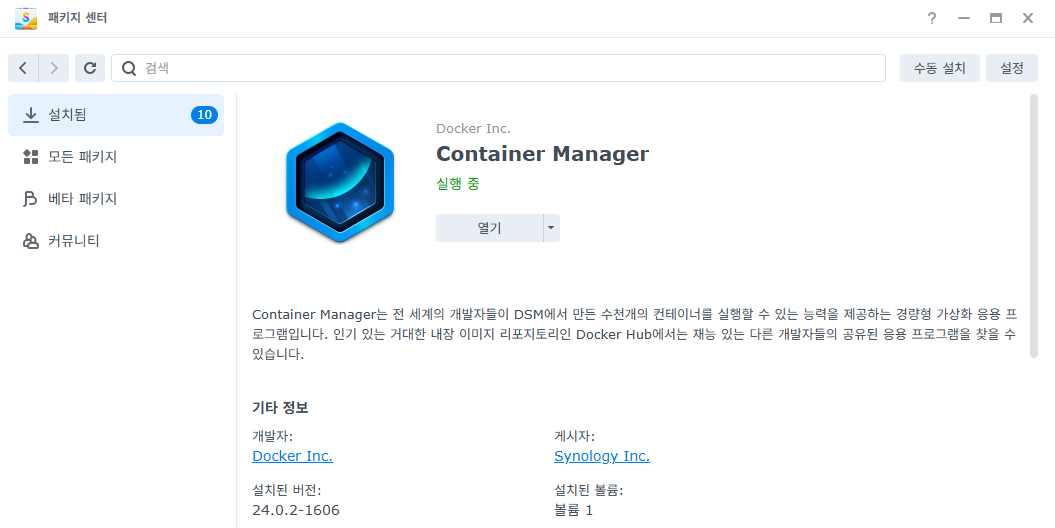
1. 사전 준비: Container Manager 설치
가장 먼저 시놀로지에서 도커를 구동하기 위한 'Container Manager'가 필요합니다.
미설치 상태라면 패키지 센터에서 설치해 주세요.
- 패키지 센터 접속 -> 'Container Manager' 검색 및 설치
2. Ollama 컨테이너 생성 (엔진 설치)
AI 모델을 실제로 구동하는 엔진인 Ollama를 먼저 설치합니다.
먼저, docker 폴더 안에 ollama 폴더를 생성합니다.
- 기본 설치 방법
- Container Manager 실행 후 [레지스트리] 탭에서
ollama/ollama를 검색해 다운로드합니다. - [이미지] 탭에서 다운로드된 이미지를 선택하고 [실행]을 누릅니다.
- 네트워크 설정: 'bridge'를 선택합니다.
- 포트 설정: 로컬 포트
11434, 컨테이너 포트11434를 입력합니다. - 볼륨 설정:
docker/ollama폴더를 생성해/root/.ollama경로와 연결합니다. (모델 데이터를 저장하는 곳입니다.)
- docker-compose를 이용한 설치 방법
- Container Manager - 프로젝트 - 생성 버튼을 클릭합니다.
- 프로젝트 이름, 경로, compose 파일을 설정합니다.
- 다음 버튼을 눌러 docker 컨테이너를 빌드합니다.
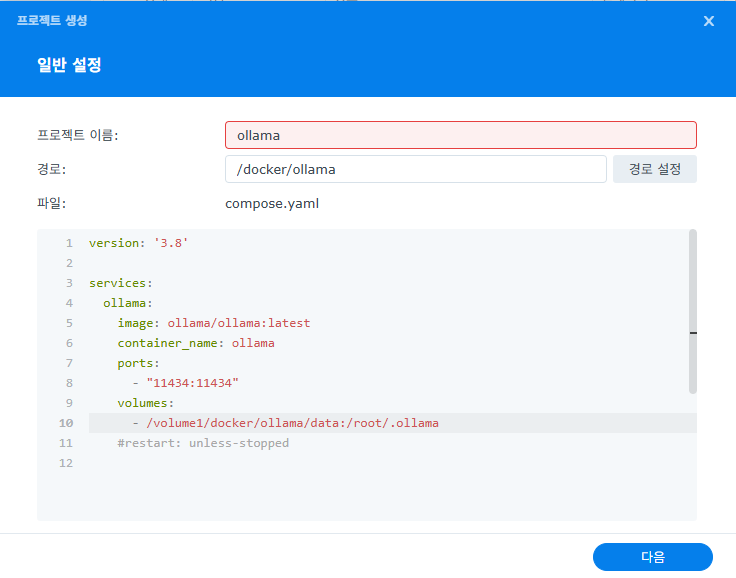
version: '3.8'

services:
  ollama:
    image: ollama/ollama:latest
    container_name: ollama
    ports:
      - "11434:11434"  # 외부 연결 포트 설정
    volumes:
      - /volume1/docker/ollama/data:/root/.ollama
    #restart: unless-stopped
3. AI 모델 다운로드하기 (LLM Pull)
ollama 컨테이너가 정상적으로 설치 되었다면, lfm 모델을 다운로드할 차례입니다.
- Container Manager의 [컨테이너] 탭에서 실행 중인
ollama컨테이너를 더블 클릭합니다. - [터미널] -> [생성] -> [bash]를 차례로 클릭합니다.
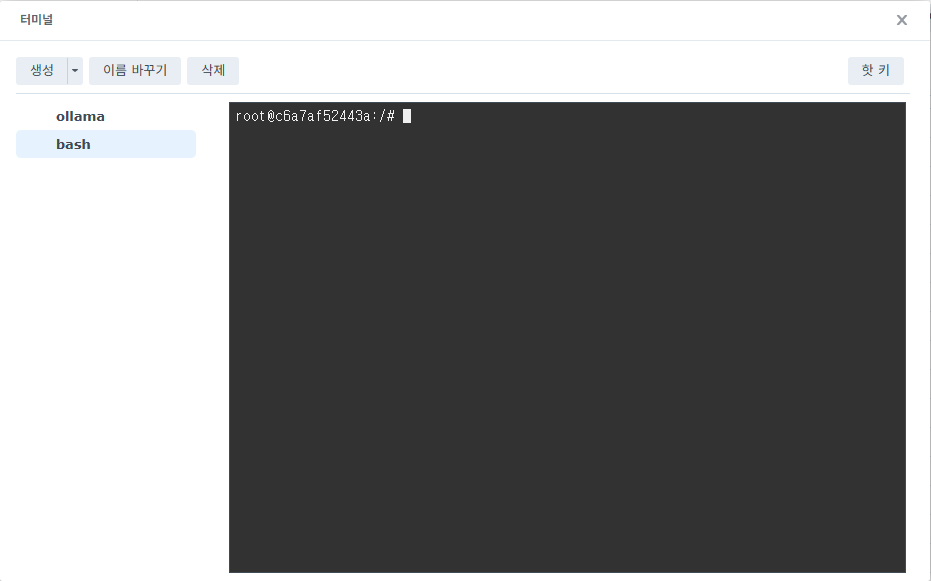
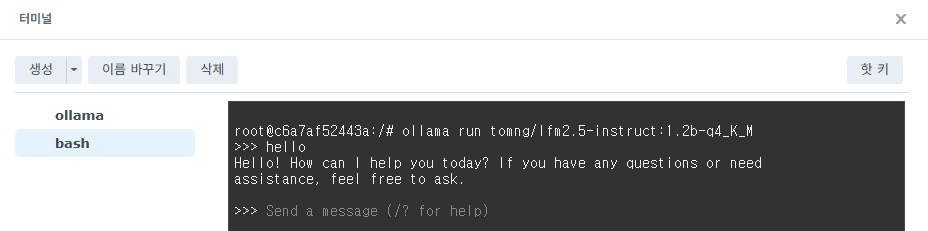
터미널 창에 아래 명령어를 입력해 원하는 모델을 받습니다.
저는 아래 튜닝된 lfm2.5-instruct 버전 모델을 다운로드 하였습니다.

Bash
ollama run tomng/lfm2.5-instruct:1.2b-q4_K_MLFM2.5 모델의 허깅페이스 페이지에 보면 각 파생 모델들에 대한 사양들이 정리되어 있습니다.
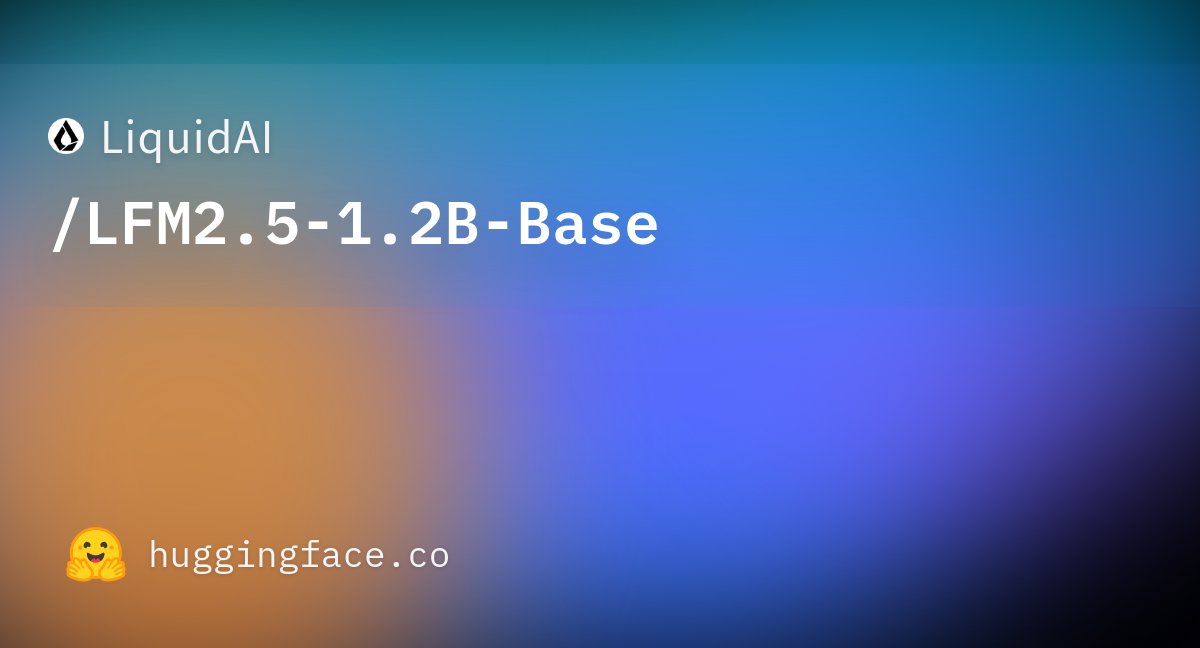
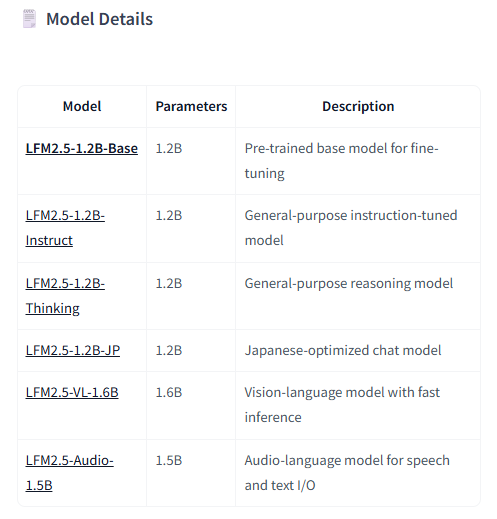

- huihui_ai/lfm2.5-abliterated
- hadad/LFM2.5-1.2B
- sam860/lfm2.5
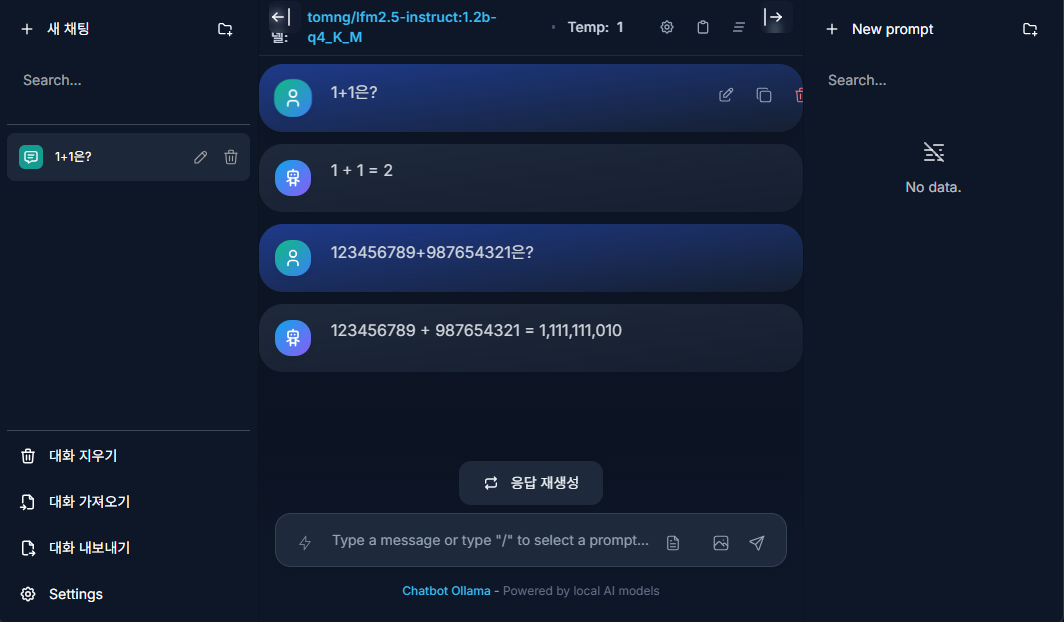
모델 다운로드가 완료되어 간단하게 테스트 해보았습니다.
4. Chatbot-Ollama 컨테이너 생성 (WebUI 설치)
이제 예쁜 채팅창 인터페이스를 입혀줄 차례입니다. ollama와 연동되는 webUI들은 많지만, 시놀로지 사양에 맞게 리소스가 적으면서 심플한 chatbot-ollama를 설치해봅니다.
- 기본 설치 방법
- 레지스트리에서
ghcr.io/ivanfioravanti/chatbot-ollama(또는 사용하신 이미지명)를 검색해 다운로드합니다. - 포트 설정: 외부에서 접속할 포트(예:
3000등)를 지정하고 컨테이너 포트(보통3000)와 연결합니다. - 환경 변수(중요!): *
OLLAMA_HOST: NAS의 내부 IP 주소(예:http://192.168.x.x:11434)를 입력해 UI가 엔진과 통신하게 합니다.
- docker-compose를 이용한 설치 방법
- Container Manager - 프로젝트 - 생성 버튼을 클릭합니다.
- 프로젝트 이름, 경로, compose 파일을 설정합니다.
version: '3.8'

services:
  lightweight-chat:
    image: ghcr.io/ivanfioravanti/chatbot-ollama:main
    container_name: ollama-chat-ui
    ports:
      - "3000:3000" # 외부와 연결할 포트 설정
    environment:
      - OLLAMA_HOST=http://IP:11434 (ollama 연결 IP:Port)
    #restart: unless-stopped
- 다음 버튼을 눌러 docker 컨테이너를 빌드합니다.
- 설치가 완료되면, 이제 웹 브라우저를 열고
http://NAS아이피:지정한포트로 접속합니다.
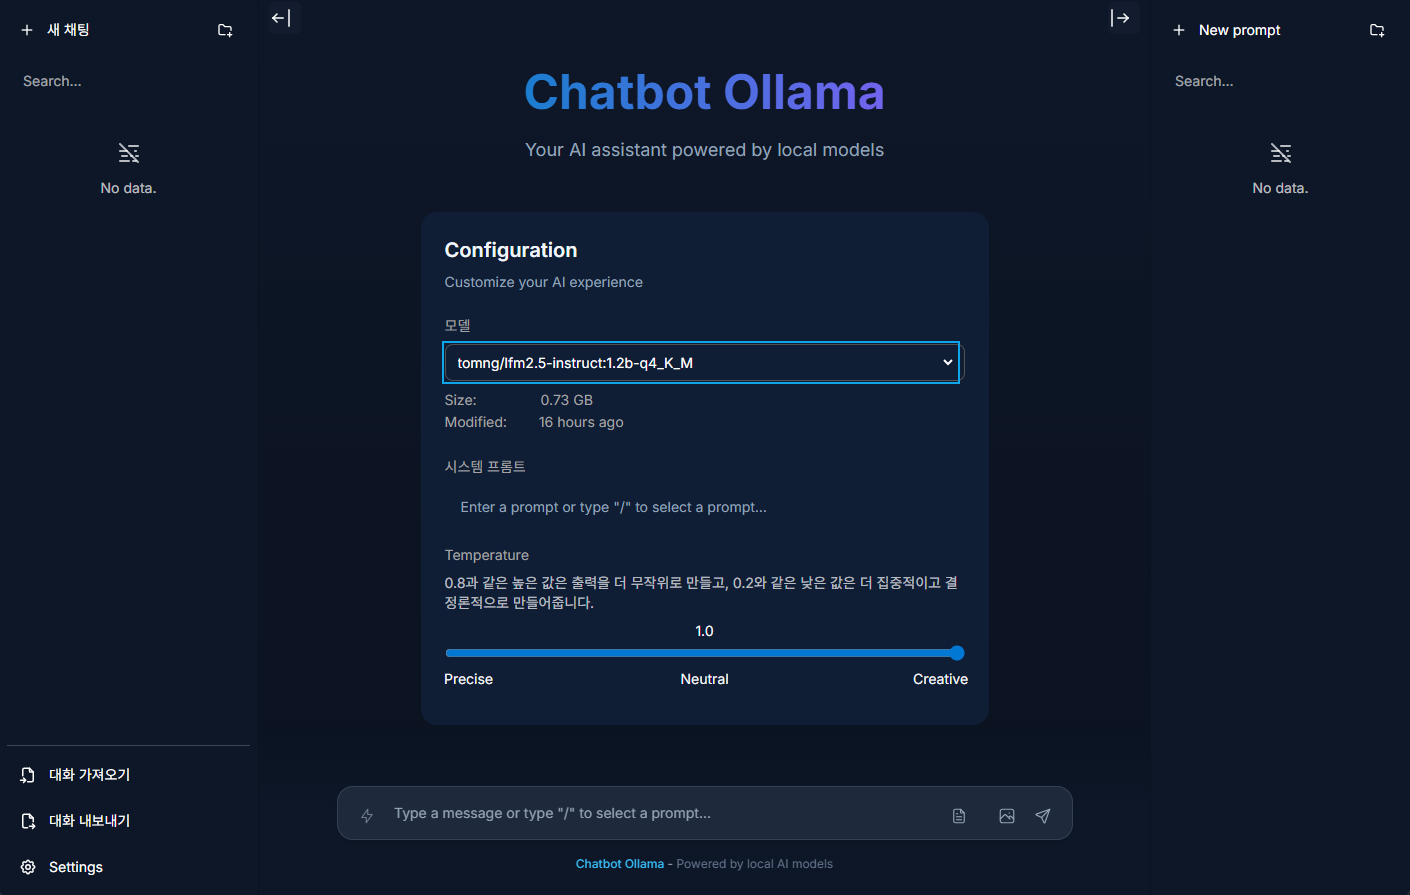
깔끔한 채팅창이 나타나면 성공입니다! 😊
5. Ollama 연결 테스트
메인화면에서 ollama에서 다운로드한 lfm 모델 리스트와 시스템 프롬프트, Temparature 같은 간단한 설정화면이 나타납니다.
모델을 선택하고 사용환경에 맞는 설정 후, 인사를 건네보세요.
시놀로지가 열심히 답변을 생성하는 것을 확인하실 수 있습니다.😁